
Clinical technique · Calcified canal systems
Hybrid MicroPath
negotiating techniques.
Available length, room for a short pre-bend, and 30°/30° watch winding.
Watch winding and pre-bending in motion.
68-second narrated videoTight walls can straighten a pre-bend before it reaches the turn. The prepared approach gives the short bend room to reach the curve, where the returning hand file continues watch winding.
Read the narration
Place a short pre-curve in the last three flutes of a size eight or ten hand file.
In a tight canal, wall contact straightens the pre-curve before it reaches the turn.
The straightened tip stops at the curve. Record this as the available length.
MicroPath, size fifteen or seventeen with a point zero three taper, enlarges the approach above the curve. This creates clearance for the short pre-curve.
Reintroduce the pre-curved size eight or ten hand file. The short bend now has room to reach the turn.
Continue watch winding: thirty degrees clockwise, then thirty degrees counterclockwise. The shoulder contacts the wall while the pre-curved tip enters the continuation.
Feel the drop as the file advances beyond the previous stop. Continue this winding motion as the file follows the canal deeper.
Consider the same mechanism in this tooth.
The prepared approach gives the short pre-curve room to reach the turn. Maintain watch winding as the instrument adapts to the canal.
Five-step guide
When your hand file stops short
A size 8 or 10 hand file reaches the same depth each time, but will not go farther. If an abrupt curve is blocking the tip, a small pre-bend can help you find the canal beyond it. Start by recording the length you can already reach.
Available length with a hand file
Take a size 8 or 10 hand file gently to the depth it will reach without force. Set the rubber stop against a stable coronal reference, withdraw the file and measure it. This is the available length for the next step. It may still be short of working length.
Keep irrigation in the canal. Re-entry should be repeatable. If a previously reached depth has been lost, or the file binds along its length, pause and reassess before continuing. The bend-and-bypass approach here addresses a loose file whose tip stops at a suspected turn.
Prepare with MicroPath size 15
Size 15 MicroPath goes to the same available length as the size 8 or 10 hand file. Take it as a single pass down to that length, come out and irrigate.
Pre-bend the hand file in the last three flutes
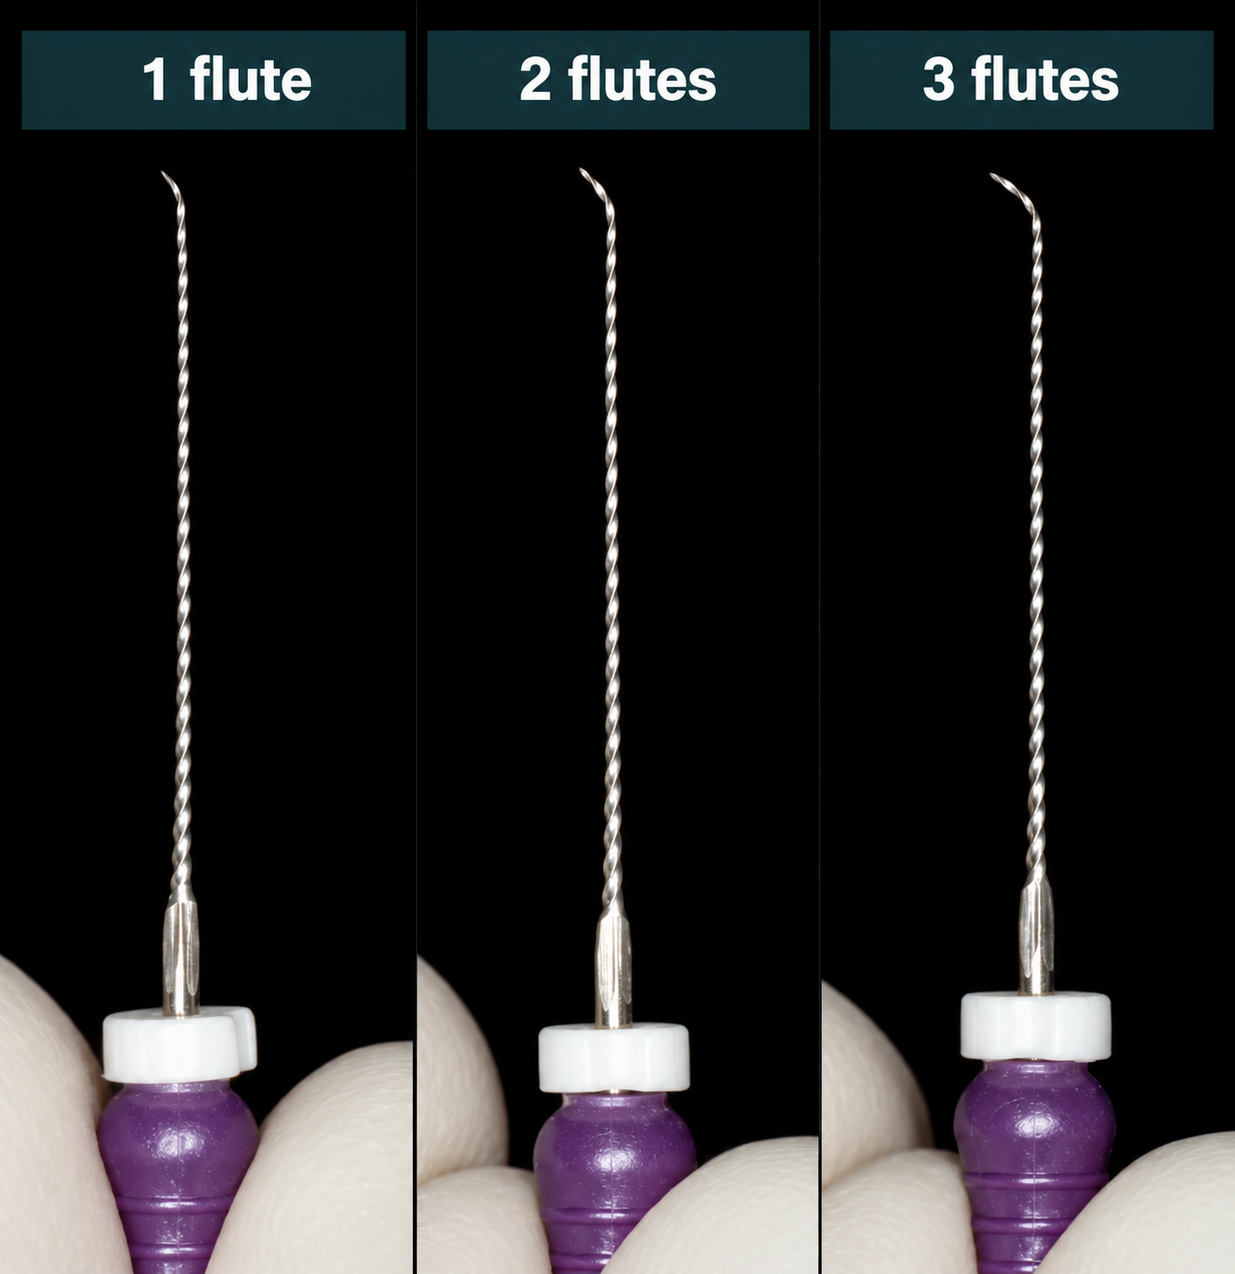
Use a size 8 or 10 stainless steel hand file. Keep the smooth tip bend within the last three flutes, about 2 mm depending on flute spacing. The bypass diagram uses the short two-flute bend within this zone. Keep the rest of the file unchanged. The image below compares bends over one, two and three flutes.
Use a suitable clinical file bender with rounded contact surfaces. Form a smooth curve without a crease or sharp kink. Inspect the tip afterwards and replace a damaged file. Remeasure the file, then align the stopper’s orientation mark with the direction of the tip bend.
The bend lets the tip point towards the canal as it turns. The stopper mark tells you which way that tip is facing once it is inside the tooth.
30°/30° watch-winding to move further apically
Pre-visualise the curve that may be preventing forward progression. Review the image and the depth of the stop to judge where the canal may turn. A curve can lie outside the plane of a radiograph. Plan the direction of the pre-bent tip before the next pass, and use the stopper’s orientation mark to keep track of that direction.
Take your pre-bent size 8 or 10 hand file. Use gentle watch-winding movements of 30° clockwise, then 30° counterclockwise, and feel for forward progression. If it meets a fixed stop, withdraw and reassess rather than increasing pressure.
Available Length
Pre-bent hand file following the curve after enlargement with size 15/.03 MicroPath
Reassess
If the hand file advances freely, be happy with about 2 mm of progress. Withdraw, clean the file, irrigate and record the new available length. Then repeat with size 15 MicroPath down to that new available length, come out and irrigate. Continue alternating with the pre-bent hand file until full working length is reached.
Passing the curve once is the start of securing the path. Repeat gentle entry until it becomes reliable. Confirm working length with an electronic apex locator and the appropriate imaging. Resolve a reading that disagrees with the expected anatomy before preparing farther.
Continue glide path development only when the route is reproducible and meets the requirements of the next instrument. Stop and reassess if the file repeatedly catches, distorts or needs pressure to advance. Record the deepest reproducible position if referral is needed.
There are other reasons why a file won’t progress
Coronal interference, a narrow canal, packed debris, a ledge, a canal division or foreign material can also prevent progress. A lost length or persistent stop needs reassessment.
Browse clinical education →Technique sources and product instructions
Based on the supplied William Nudera and Jorge Vera training recordings, including the small tip bend and bypass demonstrations. Vera’s precurving example credits Bernice Ko. The MicroPath sequence is an EndoTech NZ draft teaching protocol.